
Easy 2-Ingredient Chocolate Fudge
Why You’ll Love This Recipe
I remember the first time I tried to make fudge from a real recipe. It was a disaster. I boiled sugar to the wrong temperature, the whole thing seized into a gritty, sugary brick, and I spent an hour scrubbing a ruined pot. I was so frustrated.
That is why I fell hard for this Easy 2-Ingredient Chocolate Fudge. It completely eliminates the stress of candy-making. You do not need a candy thermometer. You do not need to worry about humidity or crystallization. It is just two ingredients that melt together into a rich, creamy fudge that tastes like something from a fancy chocolate shop.
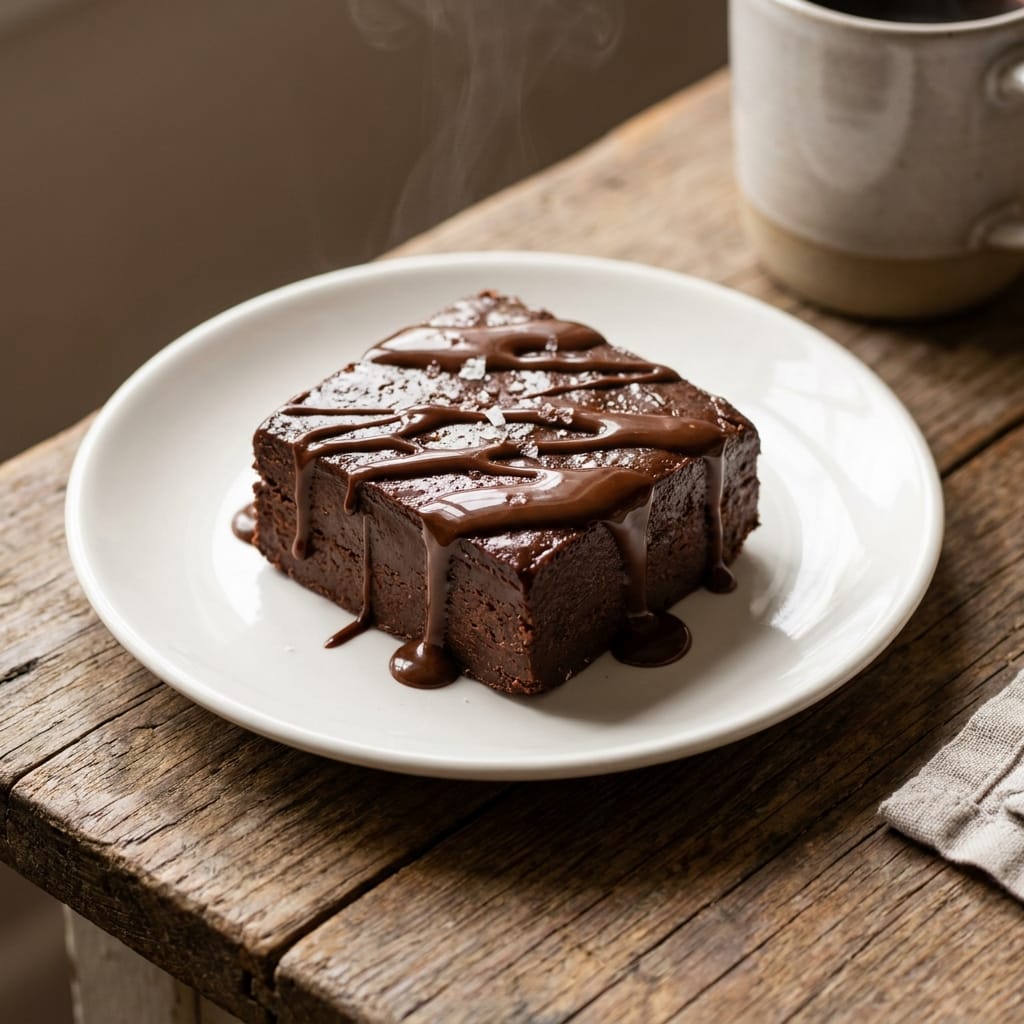
This Easy 2-Ingredient Chocolate Fudge has saved me countless times. I make it for holiday cookie plates, last-minute teacher gifts, and even just for a quiet night on the couch. It is the most forgiving dessert I know. The texture is a perfect fudge texture: dense, smooth, and melt-in-your-mouth soft. It is not too sweet, which makes it dangerously easy to eat. For more on the science of how chocolate melts best, you can check out this Wikipedia article on tempering chocolate.
Ingredients
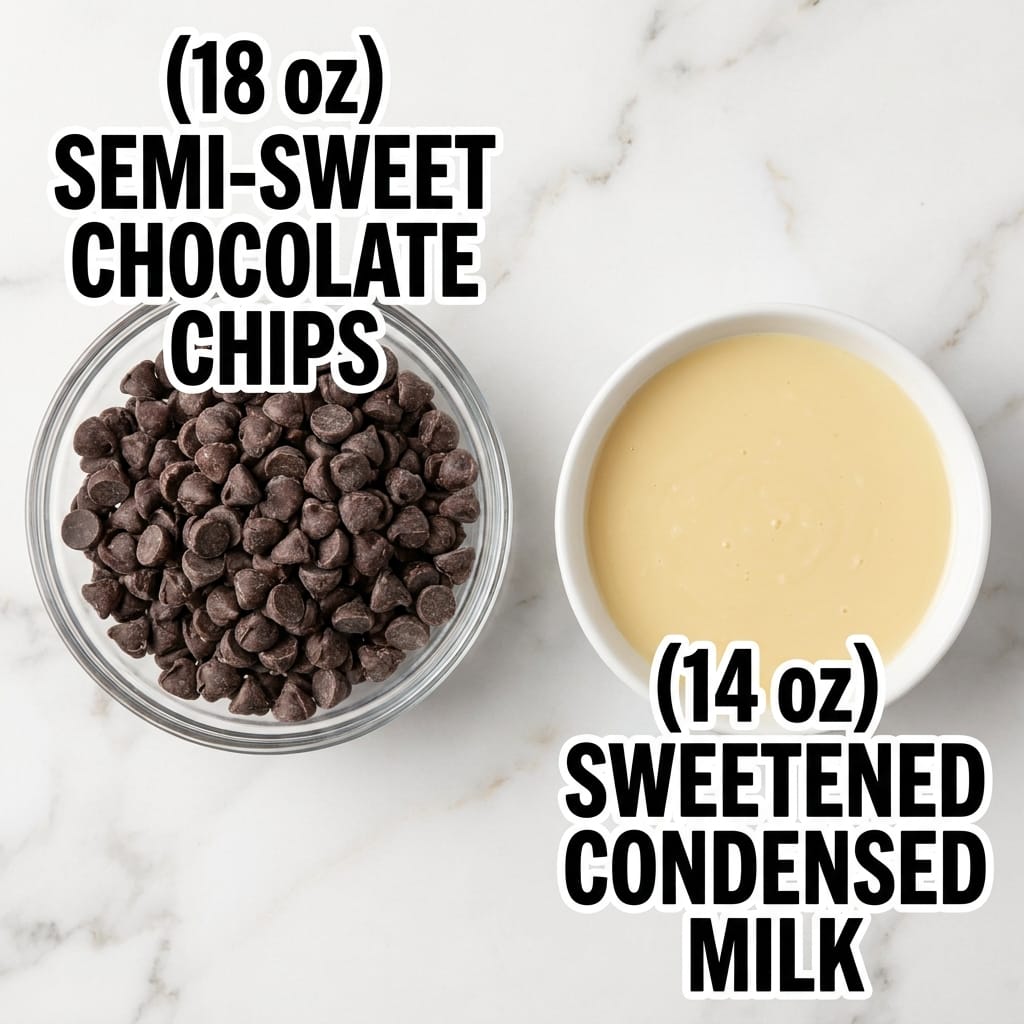
- 3 cups (18 oz) semi-sweet chocolate chips
- 1 can (14 oz) sweetened condensed milk
Step-by-Step Directions
- First, get your pan ready. Line an 8×8 inch baking dish with a big sheet of parchment paper. Let the paper hang over the edges on two opposite sides. This creates handles that will let you lift the whole block of fudge out later with zero mess. Give the paper a light spritz of non-stick spray for extra insurance.
- Find your largest microwave-safe bowl. Pour all of the chocolate chips into it. Then, pour the entire can of sweetened condensed milk right over the top of the chips. Do not stir them yet. Just let the milk sit on top.
- Put the bowl in the microwave and heat it on high power for 60 seconds. When the timer goes off, pull the bowl out. The milk will look hot and the chips will look shiny but mostly still solid. This is perfect. Do not heat it again yet.
- Now comes the critical part. Grab a rubber spatula and start stirring. You need to stir continuously, scraping the bottom and sides of the bowl. The heat from the milk will slowly melt the chips as you mix. Keep going until the mixture is completely smooth, glossy, and has no streaks of white or lumps of unmelted chocolate. This usually takes about 2 minutes of steady stirring. The smell at this point is deep and rich, like melted hot chocolate.
- Pour the molten fudge mixture into your prepared pan. Use the spatula to spread it into an even layer, pushing it into the corners. The fudge will be thick and shiny. Give the pan a few gentle taps on the counter to settle it and pop any air bubbles.
- Place the pan in the refrigerator. Let it chill, uncovered, for at least 2 hours. It needs to be completely firm to the touch. Do not rush this step. If the fudge is still soft, it will be impossible to cut cleanly.
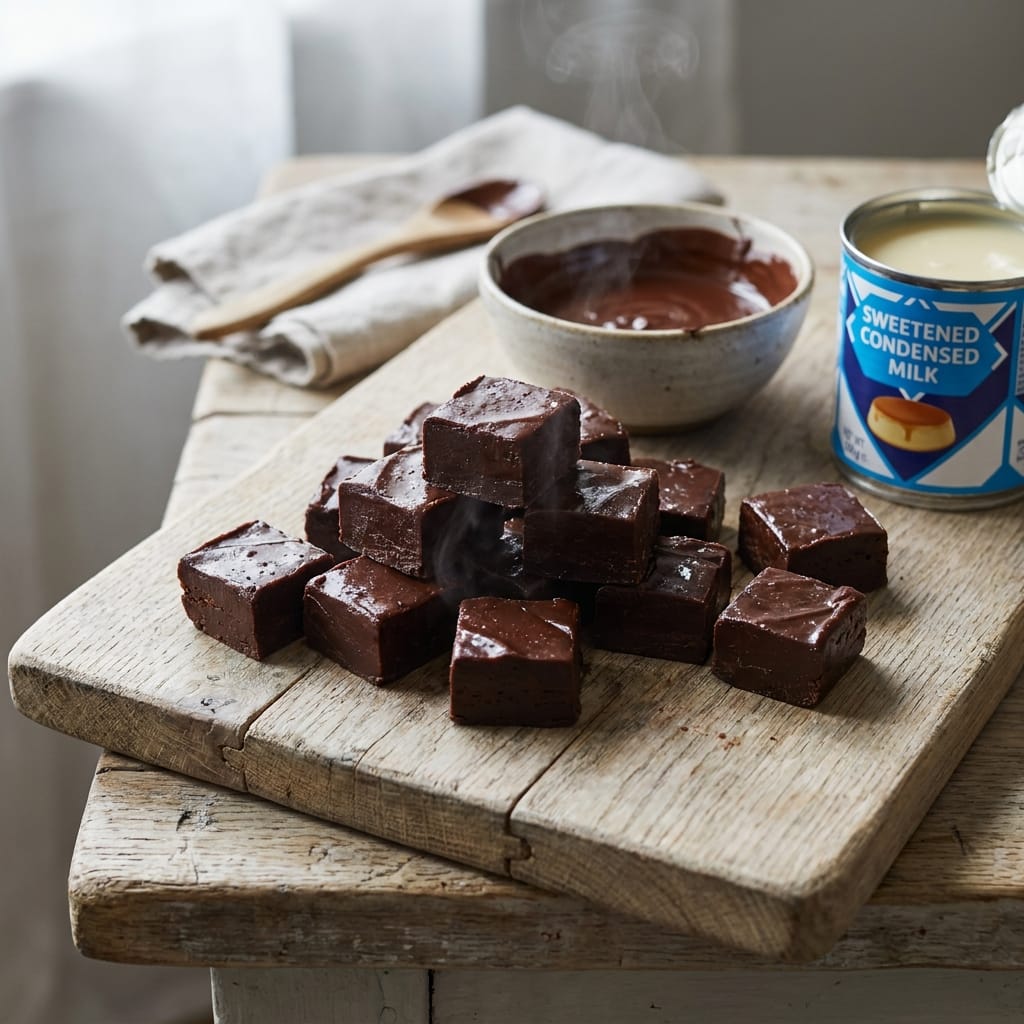
- Once it is fully set, lift the fudge out of the pan using the parchment handles. Place the block on a cutting board. Use a large, sharp chef’s knife to cut it into small squares. For the cleanest cuts, wipe the knife blade clean with a paper towel between each slice.
Pro Tips for Success
The biggest mistake people make with this Easy 2-Ingredient Chocolate Fudge is overheating the chocolate. If you microwave it for too long, or at too high a power, the chocolate can scorch and seize. It will turn into a thick, grainy paste that is impossible to save. Always start with just 60 seconds and rely on the residual heat and your stirring to finish the job.
Your choice of chocolate matters a lot here. I strongly recommend using a high-quality brand of chocolate chips, like Ghirardelli or Guittard. Cheaper chips often contain less cocoa butter and more stabilizers, which can result in a fudge that is waxy or doesn’t set up properly. If you want a deeper, less sweet fudge, you can use a mix of semi-sweet and dark chocolate chips. To understand why chocolate quality matters so much, read this Wikipedia article on cocoa butter.
Finally, do not skip lining the pan with parchment paper. Trying to scoop hardened fudge out of a bare metal or glass pan is a nightmare. The parchment handles make the entire process effortless. It is a tiny bit of prep that saves a huge amount of frustration.
Servings and Timing
This recipe makes about 36 small squares of fudge, depending on how you cut them. The total active prep time is only about 5 minutes. The fudge needs at least 2 hours to chill and set in the refrigerator before you can slice it.
Variations and Substitutions
This Easy 2-Ingredient Chocolate Fudge is a perfect base for customization. For a peanut butter version, stir in 1/2 cup of creamy peanut butter right after the chocolate is melted, just before pouring it into the pan. Swirl it gently for a marbled look.
If you want a minty fudge, add 1/2 teaspoon of peppermint extract along with the chocolate chips before microwaving. You can also fold in 1 cup of mini marshmallows, crushed peppermint candies, or chopped walnuts or pecans after the fudge is smooth. For a salted version, sprinkle a little flaky sea salt on top of the fudge right after you pour it into the pan.
What to Serve With This
This rich fudge is wonderful on its own, but it also makes a fantastic component of a larger dessert board. I love serving it alongside my Crispy Salted Caramel Popcorn for a sweet and salty snack mix. It also pairs beautifully with a classic No-Bake Peanut Butter Pie for a truly decadent dessert spread.
Storage and Reheating
Store your Easy 2-Ingredient Chocolate Fudge in an airtight container in the refrigerator. It will stay fresh and delicious for up to two weeks. You can also freeze it for up to three months. To freeze, place the cut squares in a single layer on a baking sheet and freeze until solid. Then, transfer the frozen squares to a freezer-safe bag or container. Let them thaw in the refrigerator for a few hours before serving. This fudge is served cold, so no reheating is needed.
FAQs
Can I use milk chocolate chips instead of semi-sweet?
Yes, you can. Be aware that milk chocolate fudge will be significantly sweeter and softer than semi-sweet. It may not set up as firmly. If you use milk chocolate, I recommend chilling it for at least 3 hours.
My fudge turned out oily and greasy. What went wrong?
This usually happens when the chocolate gets too hot and the cocoa butter separates from the solids. You may have microwaved it for too long. Next time, stick to the 60-second rule and stir vigorously. If your fudge is greasy after chilling, it is likely over-heated and cannot be fixed.
Can I make this in a slow cooker instead of the microwave?
I have tried this and I do not recommend it. The slow cooker gets too hot and holds heat for too long, which can easily scorch the condensed milk and make the chocolate grainy. The microwave method is faster and much more reliable.
What happens if I accidentally use unsweetened chocolate?
The fudge will be very bitter and not very pleasant. You would need to add a significant amount of sugar to balance it, which would change the texture. Stick to semi-sweet or a mix of semi-sweet and milk chocolate for the best flavor.
Can I double this recipe for a 9×13 pan?
Absolutely. To double it, use 6 cups of chocolate chips and two 14-ounce cans of sweetened condensed milk. You will need to microwave it for about 90 seconds instead of 60, then stir thoroughly. The chilling time will also be a bit longer, around 3 to 4 hours.
Conclusion
This Easy 2-Ingredient Chocolate Fudge is my secret weapon for effortless dessert. It is so simple that you can whip it up in five minutes, yet it looks and tastes like you spent hours in the kitchen. I hope you give it a try and see how easy homemade fudge can be. Let me know in the comments how yours turns out and what mix-ins you decided to use.
 | ||||||||||||||||||||||||||||||||||||