
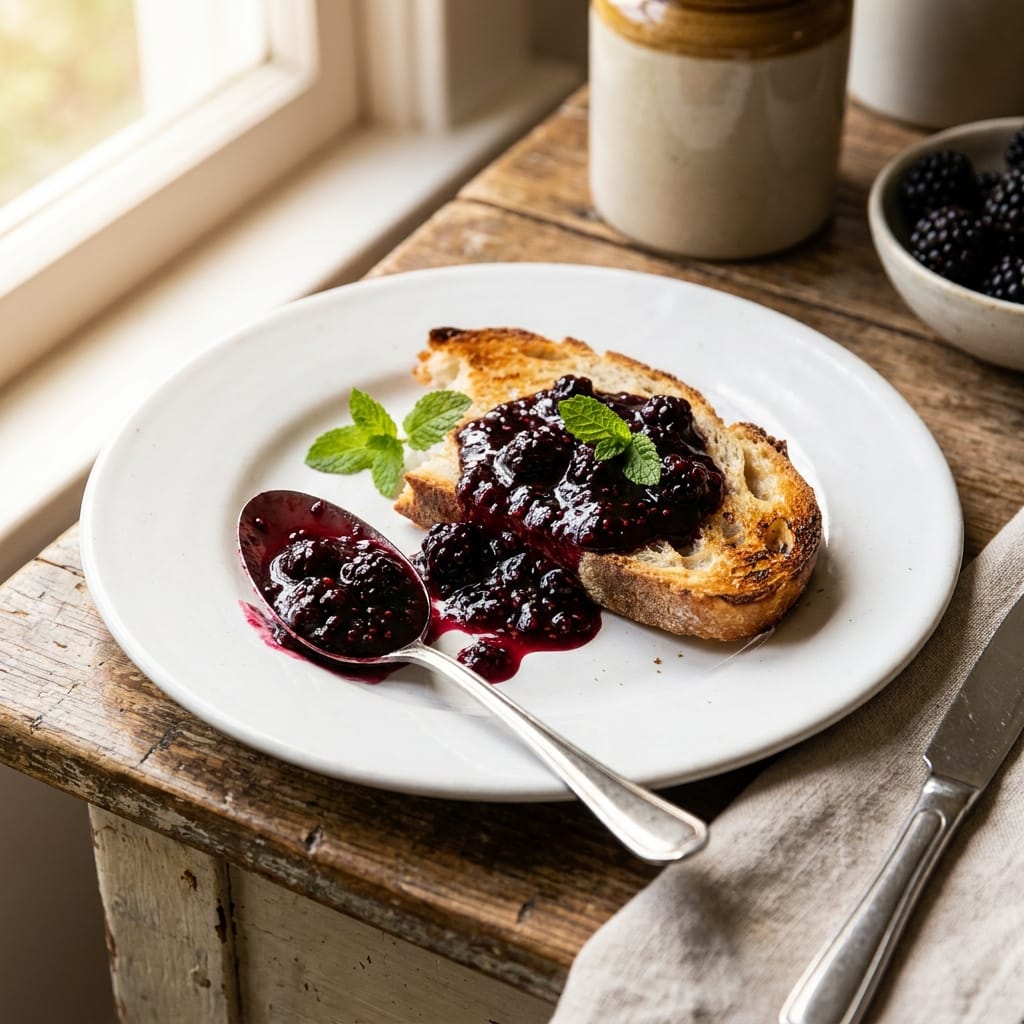
Homemade Old Fashioned Blackberry Jam
Why You’ll Love This Recipe
I still remember the first time I tried to make blackberry jam. I was so excited, I picked a huge bucket of wild berries from the patch behind my grandmother’s house. I boiled them down, added sugar, and waited. And waited. And waited some more. After hours of cooking, I ended up with a dark, sticky, burnt mess that tasted more like caramel than fruit. It was heartbreaking.
That disaster taught me everything I needed to know about making a proper Homemade Old Fashioned Blackberry Jam. The key is patience and the right technique. This recipe is the result of many, many batches of trial and error. It is the easiest, most foolproof method I have ever found. It gives you a jam that is perfectly set, deeply fruity, and not at all runny. It is the kind of jam you want to spread on a warm biscuit on a Sunday morning.
The beauty of this Homemade Old Fashioned Blackberry Jam is that it uses simple, honest ingredients. Just blackberries, sugar, and a little lemon juice. No commercial pectin needed. The natural pectin in the fruit and the slow cooking process create a beautiful, soft set. It is a true taste of summer that you can enjoy all year long. For more information on the science of pectin and how it helps your jam set, you can read this excellent article on Wikipedia about pectin.
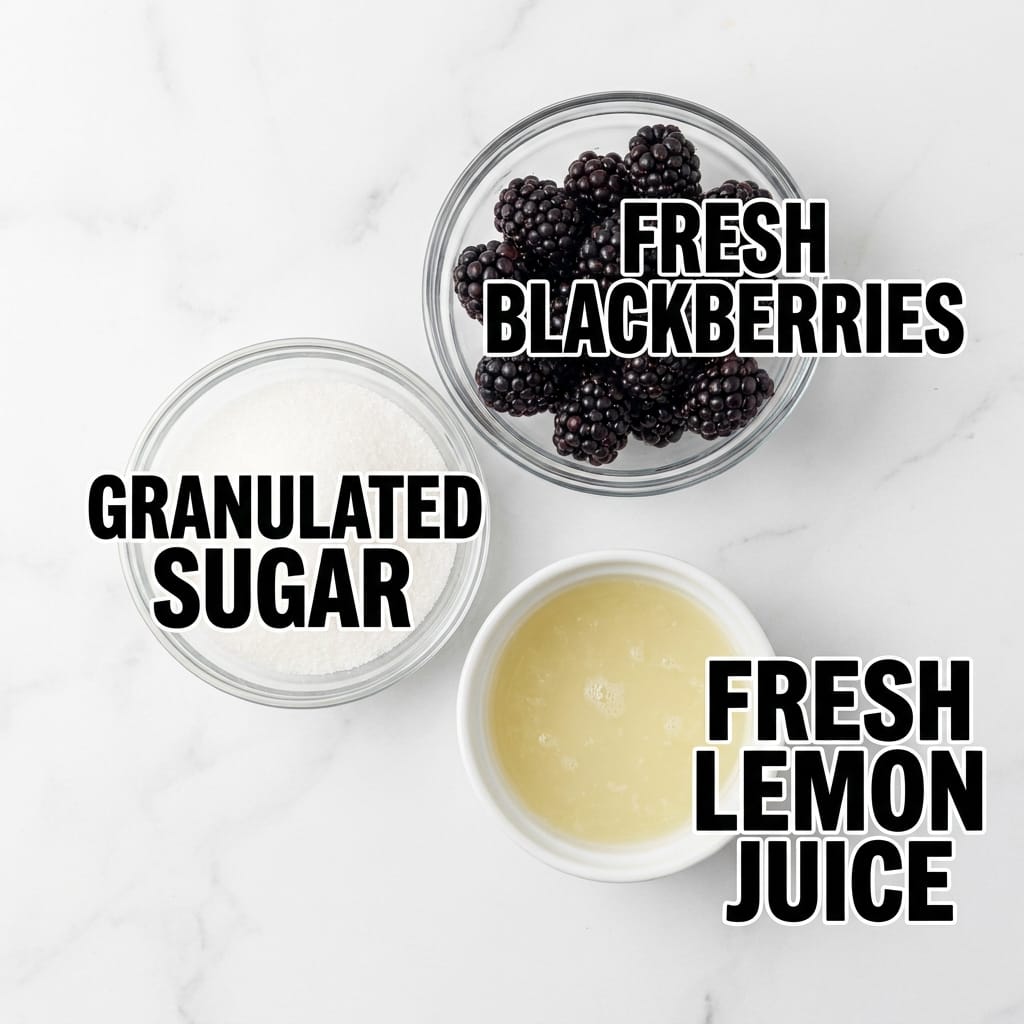
Ingredients
- 6 cups fresh blackberries (about 1.5 pounds)
- 4 cups granulated sugar
- 2 tablespoons fresh lemon juice
Step-by-Step Directions
First, you need to get your blackberries ready. Give them a quick rinse in a colander and pick out any stems or leaves that might have hitched a ride. You do not need to dry them perfectly, just let the excess water drip off.
Now, get your largest, heaviest-bottomed pot onto the stove. I use a wide Dutch oven for this. Drop in the blackberries and the lemon juice. Turn the heat to medium. Start mashing the berries gently with a potato masher or the back of a wooden spoon. You want to break them up a bit, but leave some whole chunks for texture. You should start to see the juices pooling at the bottom of the pot.
Once the berries are simmering and releasing their juices, pour in all the sugar at once. Stir it in with a long-handled spoon until the sugar is completely dissolved. This is really important. If you see any sugar crystals clinging to the side of the pot, brush them down with a wet pastry brush. Undissolved sugar can cause your whole batch to crystallize later.
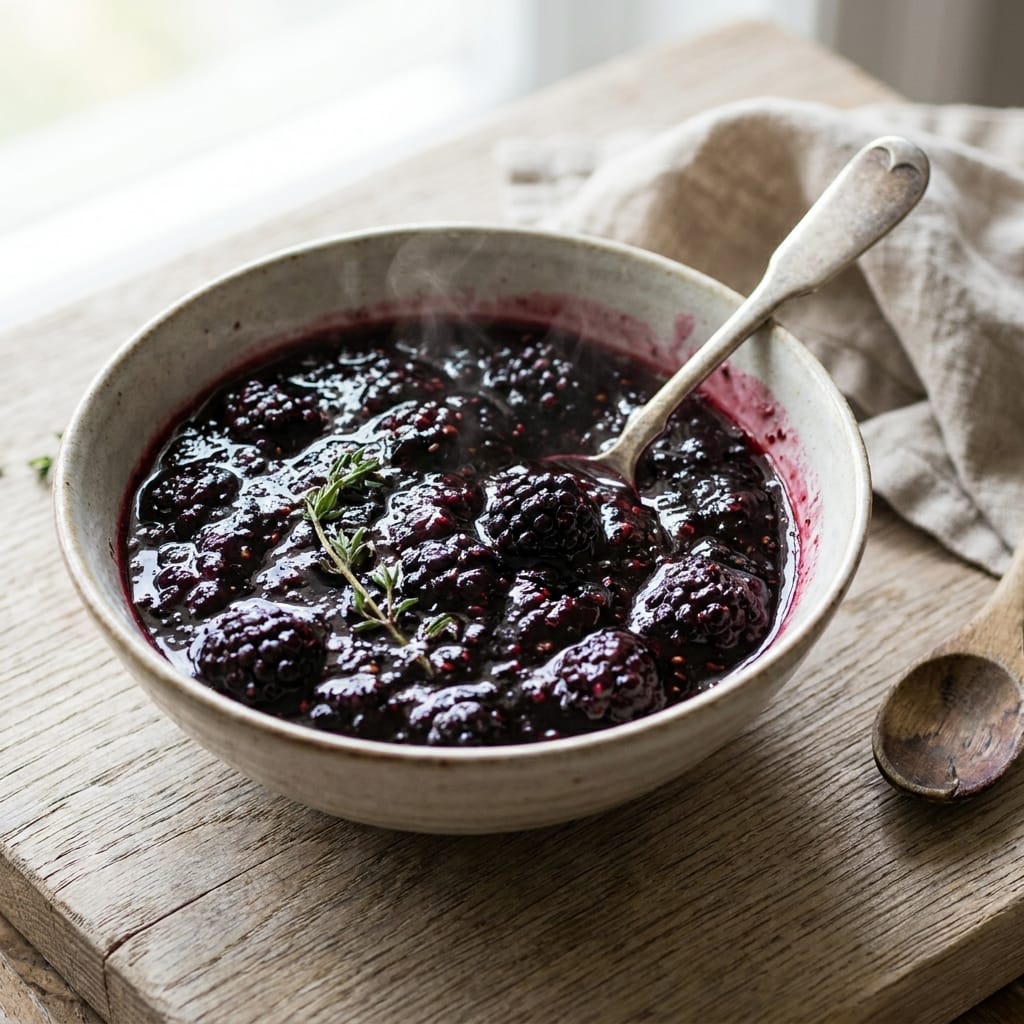
Bring the whole mixture to a full, rolling boil. This means a boil that you cannot stir down. It should be bubbling vigorously all over the surface. Set a timer for exactly 20 minutes. Do not walk away. Stir it occasionally to make sure the bottom is not scorching. The jam will get darker and thicker as it goes.
After 20 minutes, you need to test if it is done. I use the cold plate test. Put a small plate in the freezer before you start. When you are ready to test, drop a tiny spoonful of the hot jam onto the cold plate. Let it sit for 30 seconds. Then, push it with your finger. If it wrinkles and does not flood back together, your Homemade Old Fashioned Blackberry Jam is ready. If it is still runny, let it boil for another 2-3 minutes and test again.
When it is ready, turn off the heat. Let the jam sit in the pot for 5 minutes. This helps the fruit settle so it does not all float to the top of your jars. Then, carefully ladle the hot jam into sterilized jars, leaving about a 1/4 inch of headspace. Wipe the rims clean, screw on the lids, and process in a boiling water bath for 10 minutes if you want to store it on the shelf. If you are just going to eat it right away, you can skip the canning and just put it in the fridge.
Pro Tips for Success
The most common mistake people make is not cooking the jam long enough. You need to get it to the gel point, which is around 220 degrees Fahrenheit on a candy thermometer. If you do not have a thermometer, the cold plate test is your best friend. Do not trust the clock alone.
Use under-ripe berries if you can find them. A few slightly green or firm blackberries are actually a good thing. They contain more natural pectin, which helps your Homemade Old Fashioned Blackberry Jam set perfectly without any added pectin powder. For a deeper dive into the chemistry of cooking with fruit, check out this Wikipedia article on cooking methods.
Never, ever double this recipe in one pot. If you try to make a huge batch at once, it will take forever to boil, and the jam will end up overcooked and tasting like burnt sugar. Stick to a single batch for the best results. You can always make two batches back to back if you have a lot of berries.
Servings and Timing
This recipe makes about 4 to 5 half-pint jars of jam. The total active prep time is about 10 minutes, and the cooking time is around 25 minutes. So from start to finish, you are looking at about 45 minutes, plus the time it takes to process the jars in a water bath if you are canning them for long-term storage.
Variations and Substitutions
You can easily swap in other berries for a mixed fruit jam. Try using half blackberries and half raspberries or blueberries. The cooking time will stay the same. If you want a less sweet jam, you can reduce the sugar to 3 cups, but you will need to cook it a little longer to get it to set. The jam will also be a bit darker in color.
For a fun twist, add a split vanilla bean to the pot while the jam is cooking. It infuses the whole batch with a warm, floral flavor that is incredible. You can also add a pinch of cinnamon or a star anise for a spiced version. Just remember to remove the spices before you jar the jam.
What to Serve With This
This Homemade Old Fashioned Blackberry Jam is absolutely perfect on a warm, buttermilk biscuit. It also makes a fantastic filling for a simple thumbprint cookie. For a really special treat, try swirling a spoonful into a bowl of plain Greek yogurt or oatmeal.
If you are looking for more ways to use your homemade jam, you should definitely try my The Easiest Fluffy Apricot Jam Cake Recipe for Ultimate Homemade Comfort!. It is a wonderful way to use up a jar of jam. You can also use it as a glaze for a simple pork roast.
Storage and Reheating
If you are not canning the jam, store it in a clean jar in the refrigerator. It will keep for about 3 to 4 weeks. The flavor actually deepens and gets even better after a day or two. If you do process the jars in a boiling water bath, they will be shelf-stable for up to a year in a cool, dark pantry.
Once you open a jar, always keep it in the fridge. Do not leave it out on the counter for more than a couple of hours. If the jam gets too thick in the fridge, you can microwave a small amount for 10 to 15 seconds to loosen it up.
FAQs
My jam is still runny after 30 minutes of boiling. What did I do wrong?
You probably had very ripe blackberries that are low in pectin. You can fix this by adding a tablespoon of fresh lemon juice and boiling for another 5 minutes. You can also stir in a teaspoon of powdered pectin dissolved in a little water, but that is not very old-fashioned.
Can I use frozen blackberries for this Homemade Old Fashioned Blackberry Jam?
Yes, absolutely. Frozen berries work perfectly. You do not even need to thaw them first. Just put them straight into the pot. The cooking time might be a couple of minutes longer because the berries are cold, but the result will be the same.
Why did my jam crystallize and turn grainy?
This usually happens when you have undissolved sugar crystals in the pot. Always stir until the sugar is completely dissolved before the mixture comes to a boil. Also, do not stir the jam once it is boiling. Stirring can introduce air bubbles that encourage crystallization.
The foam on top of my jam looks weird. Should I skim it off?
Yes, you should skim off the foam. It is just air bubbles and impurities from the fruit. It will make your jam look cloudy if you leave it in. Use a large metal spoon to gently skim the foam off the top of the jam before you ladle it into the jars.
Can I make this jam with less sugar?
You can, but it will change the texture and the set. Sugar is not just for sweetness. It helps the jam gel and acts as a preservative. If you reduce the sugar too much, your Homemade Old Fashioned Blackberry Jam will be very runny and will not last as long in the fridge.

Conclusion
Making your own Homemade Old Fashioned Blackberry Jam is one of the most rewarding things you can do in the kitchen. It smells like summer, tastes like pure sunshine, and fills your pantry with beautiful jars of love. I promise you, once you taste this jam straight from the pot, you will never go back to the store-bought stuff. Give it a try and let me know how it turns out. I would love to hear about your jam-making adventures.
 | ||||||||||||||||||||||||||||||||||||||