How to Make Dill Pickles
Why You’ll Love This Recipe
I have a deep love for a crisp, cold pickle. But for years, I bought them at the store, never thinking I could make them myself. That changed one summer when my garden produced a mountain of cucumbers. I had to figure out How to Make Dill Pickles or watch them all go to waste.
My first batch was a flop. The pickles were soft and sad. I was so discouraged. But I am stubborn, so I tried again. I learned that the secret to a crunchy pickle is all in the preparation. It is not about being a professional chef. It is about a few simple, science-backed steps.
This recipe is the result of many, many jars. It is the method I now trust completely. It gives you that perfect snap every time. If you have ever wondered how the ancient art of pickling works, this is the perfect place to start. I promise, you will never go back to store-bought.
Ingredients
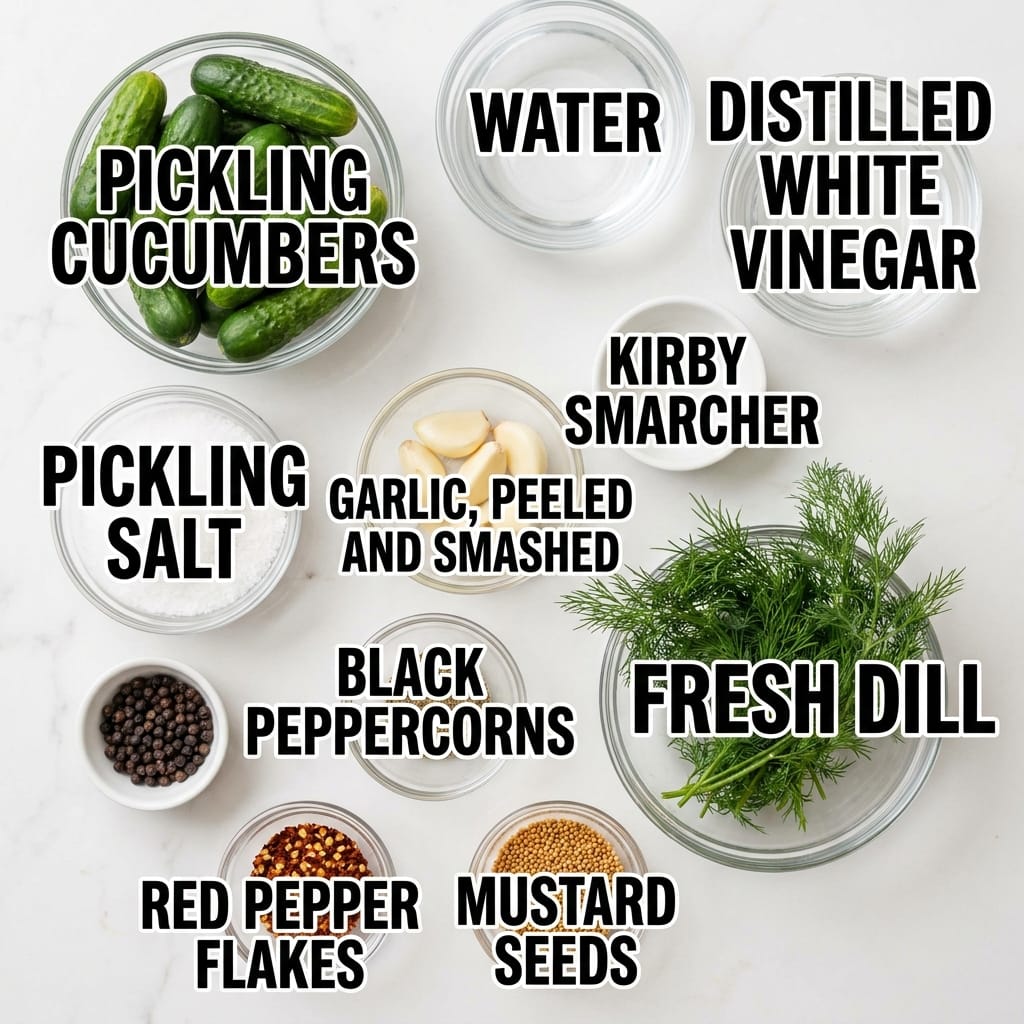
- 2 pounds pickling cucumbers (Kirby cucumbers are best)
- 4 cups water
- 1 cup distilled white vinegar (5% acidity)
- 2 tablespoons pickling salt (do not use table salt)
- 4 cloves garlic, peeled and smashed
- 4 heads fresh dill (or 2 teaspoons dill seeds)
- 1 teaspoon black peppercorns
- 1/2 teaspoon red pepper flakes (optional, for heat)
- 1 teaspoon mustard seeds
Step-by-Step Directions
First, wash your cucumbers very well. I scrub them with a vegetable brush under cold water. Then, cut off the very tip of the blossom end. That tiny piece contains an enzyme that can make your pickles mushy. Getting rid of it is step one for crunchy success.
Now, make your brine. In a medium saucepan, combine the water, vinegar, and pickling salt. Bring it to a full boil over high heat. Stir it a few times to help the salt dissolve completely. While that heats up, pack your jars.
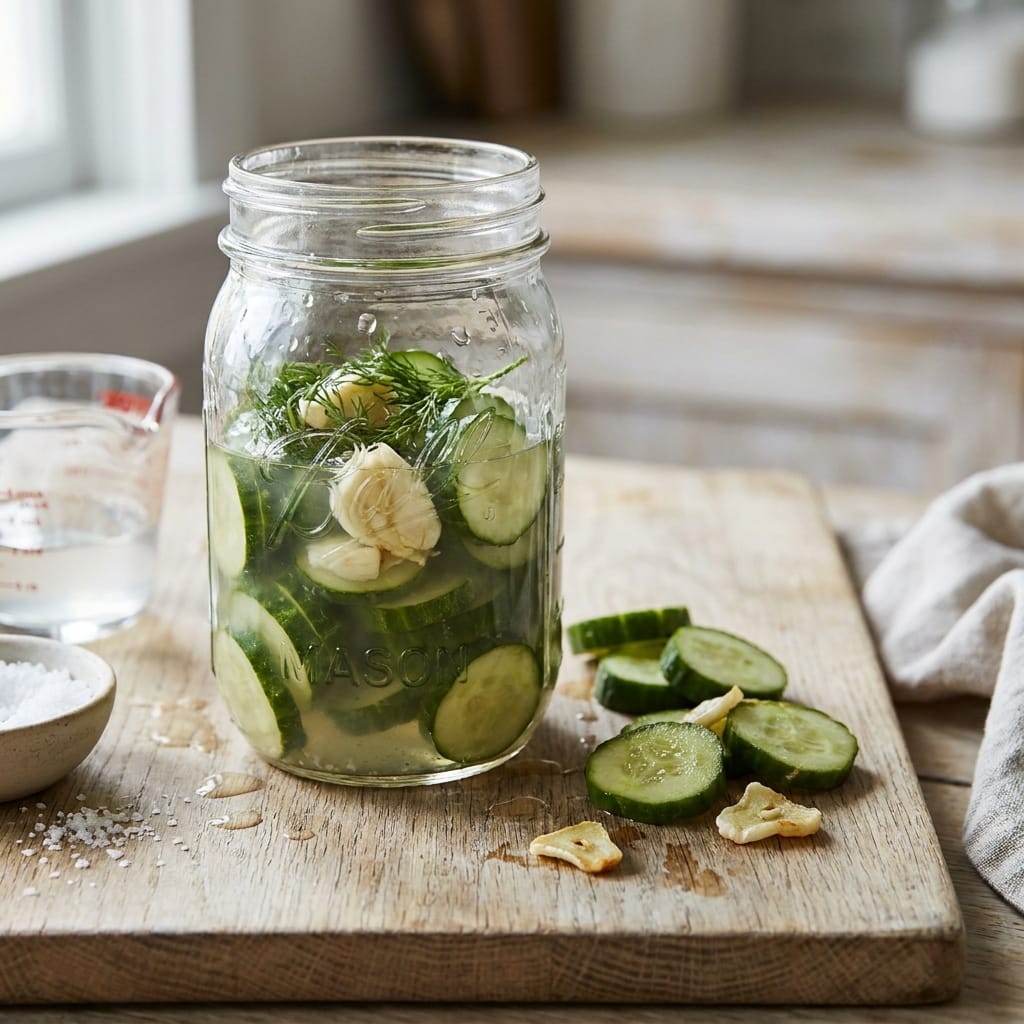
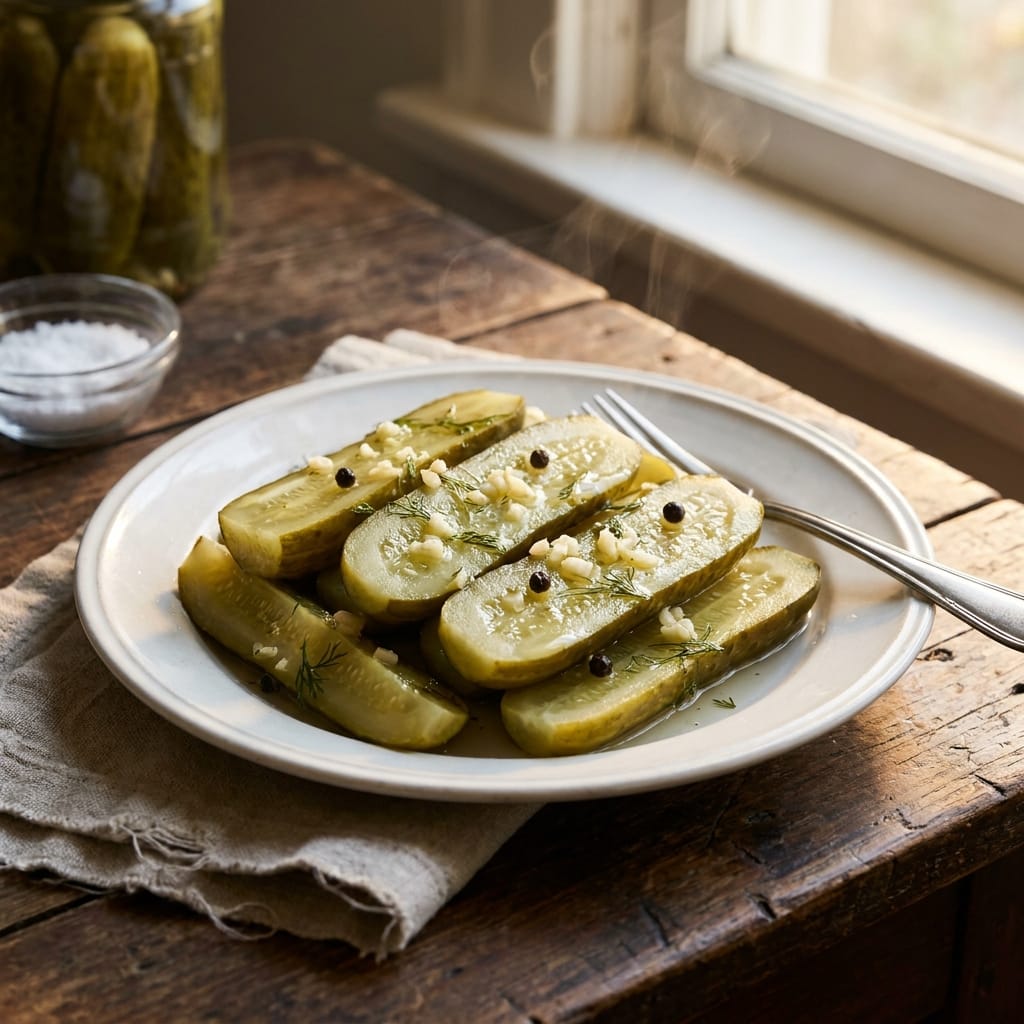
I use two clean quart-sized mason jars. Into each jar, I put 2 smashed garlic cloves, a big head of fresh dill, 1/2 teaspoon of peppercorns, and a pinch of red pepper flakes. Then, I pack the cucumbers in tightly. You want them standing up or laying down, but they should be snug.
Once the brine is boiling and the salt is gone, I pour it carefully over the cucumbers in the jars. You need to leave about 1/2 inch of headspace at the top. Use a chopstick to gently poke around the inside of the jar. This releases any trapped air bubbles.
Finally, screw on the lids. Do not over-tighten them. Let the jars cool completely on the counter. You will hear the lids pop as they seal. Once cool, move them to the fridge. This is how you make refrigerator pickles. They are ready to eat in 48 hours, but they get even better after a week.
Pro Tips for Success
The most important tip is to use the right cucumber. Do not use standard salad cucumbers. They are too watery and will turn into mush. You must use pickling cucumbers, often called Kirby cucumbers. They are firmer and have a lower water content.
My second tip is about the salt. Do not use iodized table salt. The iodine and anti-caking agents can make your brine cloudy and affect the flavor. Always use a pure pickling salt or a kosher salt. You can read more about why pickling salt is different for better results.
Third, do not skip the step of cutting off the blossom end. I know it seems fussy, but it is a game changer for texture. That little green tip holds an enzyme that softens pickles. Removing it is the single best way to guarantee a crunchy bite.
Servings and Timing
This recipe makes 2 quarts of How to Make Dill Pickles. The active prep time is about 15 minutes. The total time is about 20 minutes of work, plus 48 hours of waiting for them to pickle in the fridge. They will keep for up to 2 months.
Variations and Substitutions
You can easily change the flavor of your How to Make Dill Pickles. For a spicier batch, add a whole sliced jalapeno to each jar. If you love garlic, double the amount. You can also swap the fresh dill for dill seeds or even use a few sprigs of fresh tarragon for a completely different herb flavor.
For a sweeter pickle, add 1/2 cup of sugar to the brine. This makes a classic bread and butter style pickle. You can also experiment with different vinegars. White wine vinegar or apple cider vinegar will give a milder, fruitier taste. Just make sure the acidity is still 5%.

What to Serve With This
These pickles are a perfect side for so many things. They are incredible with a classic classic BBQ pulled pork sandwich. The tangy crunch cuts right through the rich, smoky meat.
I also love chopping them up and adding them to a creamy tuna salad for extra crunch and flavor. They are also fantastic on a charcuterie board or just eaten straight out of the jar as a snack.
Storage and Reheating
These are refrigerator pickles, so they must be stored in the fridge. They will stay crunchy and delicious for up to 2 months. You do not need to reheat them. They are served cold. Always use a clean, dry fork to take pickles out of the jar. This prevents bacteria from getting in and spoiling the brine.
FAQs
Why are my homemade pickles mushy?
That is the most common problem. The main reasons are using the wrong type of cucumber, not cutting off the blossom end, or letting them sit at room temperature too long. Using a firm, fresh Kirby cucumber and following the steps exactly will fix this.
Can I use apple cider vinegar instead of white vinegar?
Yes, you can. It will change the flavor slightly, making it a bit milder and fruitier. Just make sure the vinegar you use has 5% acidity. This is essential for safe pickling. The brine needs that specific level of acid.
How long do I have to wait before eating them?
I know it is hard, but wait at least 48 hours. The flavor needs time to develop. After one week, they are at their absolute best. The garlic and dill really penetrate the cucumbers by then.
Can I reuse the brine to make another batch?
I do not recommend it. The brine loses its acidity and flavor after the first use. You also risk introducing bacteria from the first batch of cucumbers. It is always best to make a fresh brine for a new batch of How to Make Dill Pickles.
What happens if I leave the garlic cloves whole instead of smashing them?
Leaving them whole is fine. The flavor will just be milder and take longer to infuse. Smashing the garlic releases more of its oils quickly, giving you a stronger garlic flavor in your pickles faster.

Conclusion
Learning How to Make Dill Pickles has been one of my favorite kitchen skills. It is so simple, and the result is so much better than anything from a store. I love seeing that jar full of perfect, crunchy spears in my fridge. I hope you give this a try. Let me know how your batch turns out. I am sure you will be making them all summer long.
 | ||||||||||||||||||||||||||||||||||||||||||||||||||