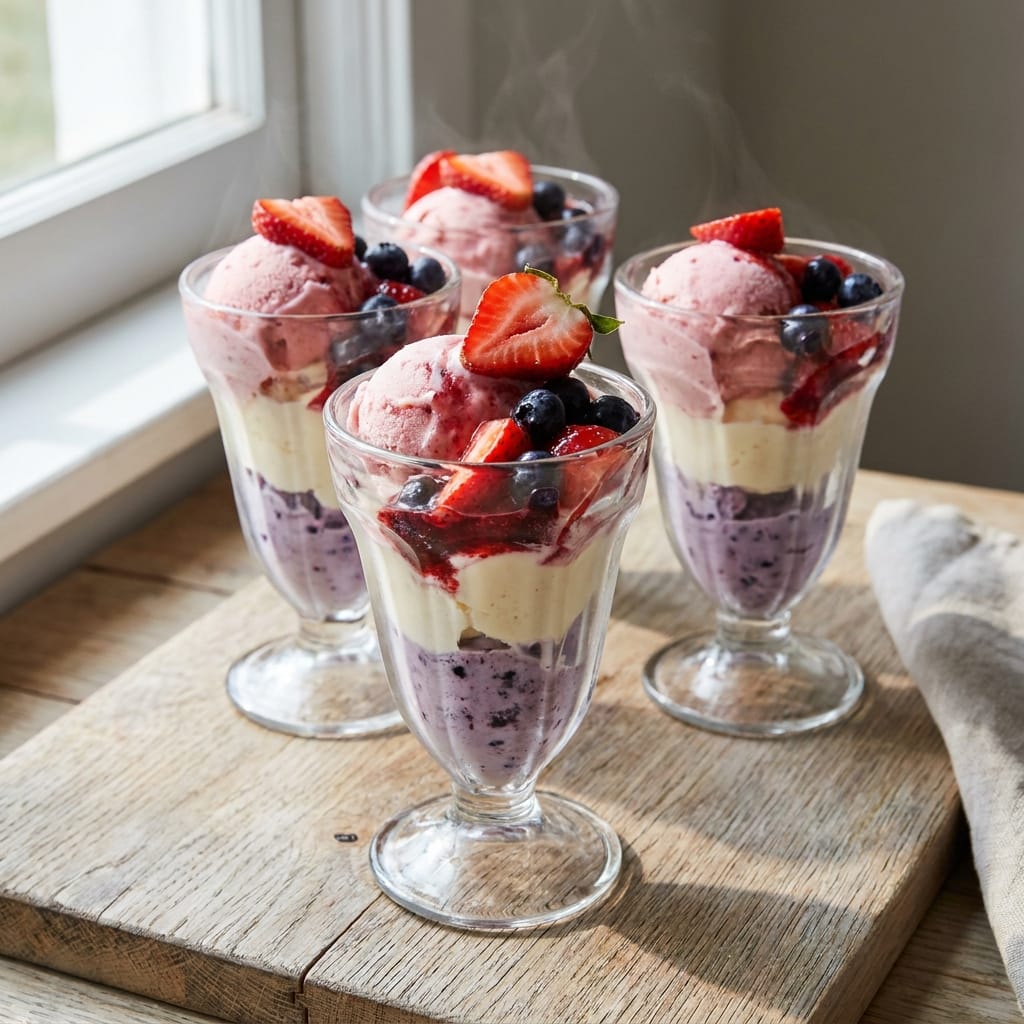
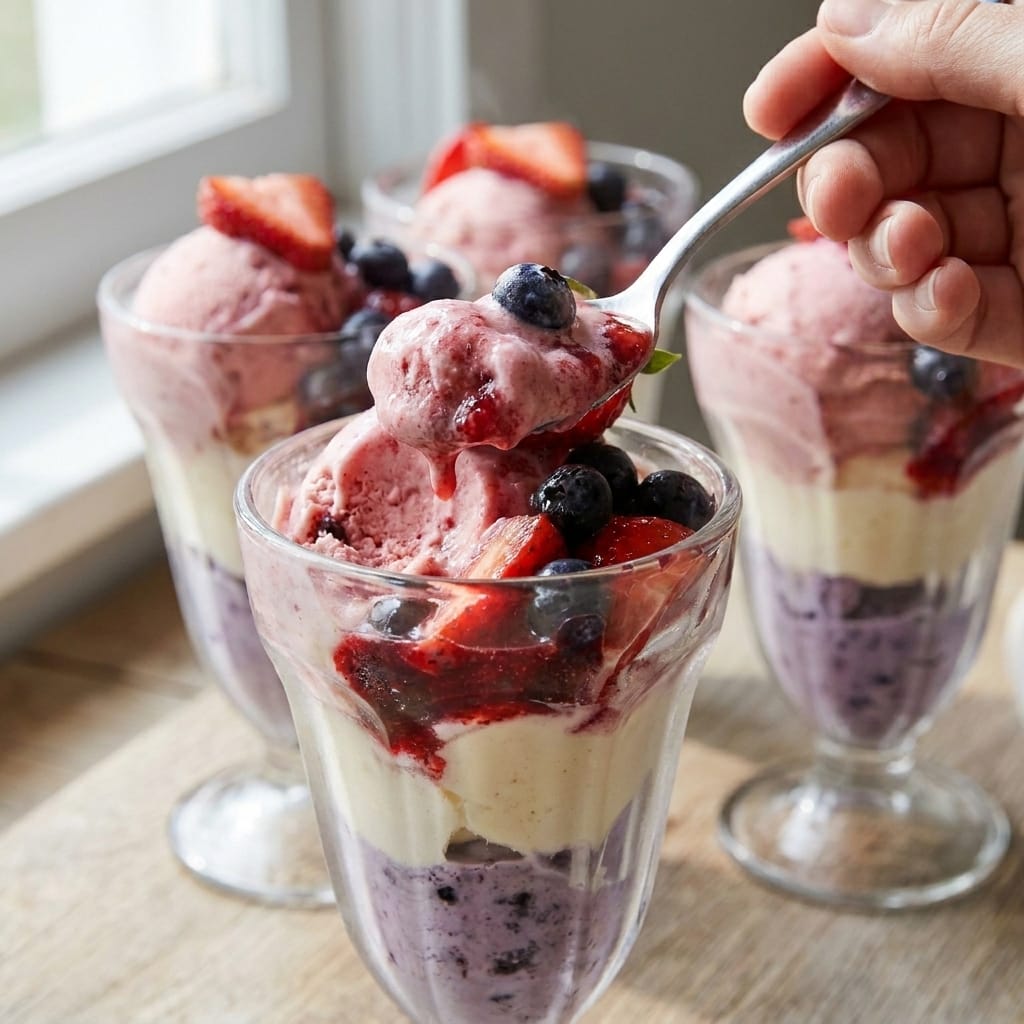
Red & White & Blue Layered Ice Cream Sundae Cups
Why You’ll Love This Recipe
I remember the first time I tried to build these Red & White & Blue Layered Ice Cream Sundae Cups for a backyard barbecue. It was a total mess. The ice cream melted into a sad puddle before I even got the toppings on. The layers looked like a muddy mess instead of a proud flag. I learned the hard way that you need a solid plan and the right tools.
This recipe is the result of all those failed experiments. I figured out exactly how to keep the ice cream firm and the layers crisp and beautiful. These Red & White & Blue Layered Ice Cream Sundae Cups are not just about looking patriotic. They are about giving you a foolproof method to create a dessert that wows everyone without any last-minute stress. You can prep the components ahead of time and assemble them in minutes. For more on the history of this classic American treat, you can read about the ice cream sundae on Wikipedia.
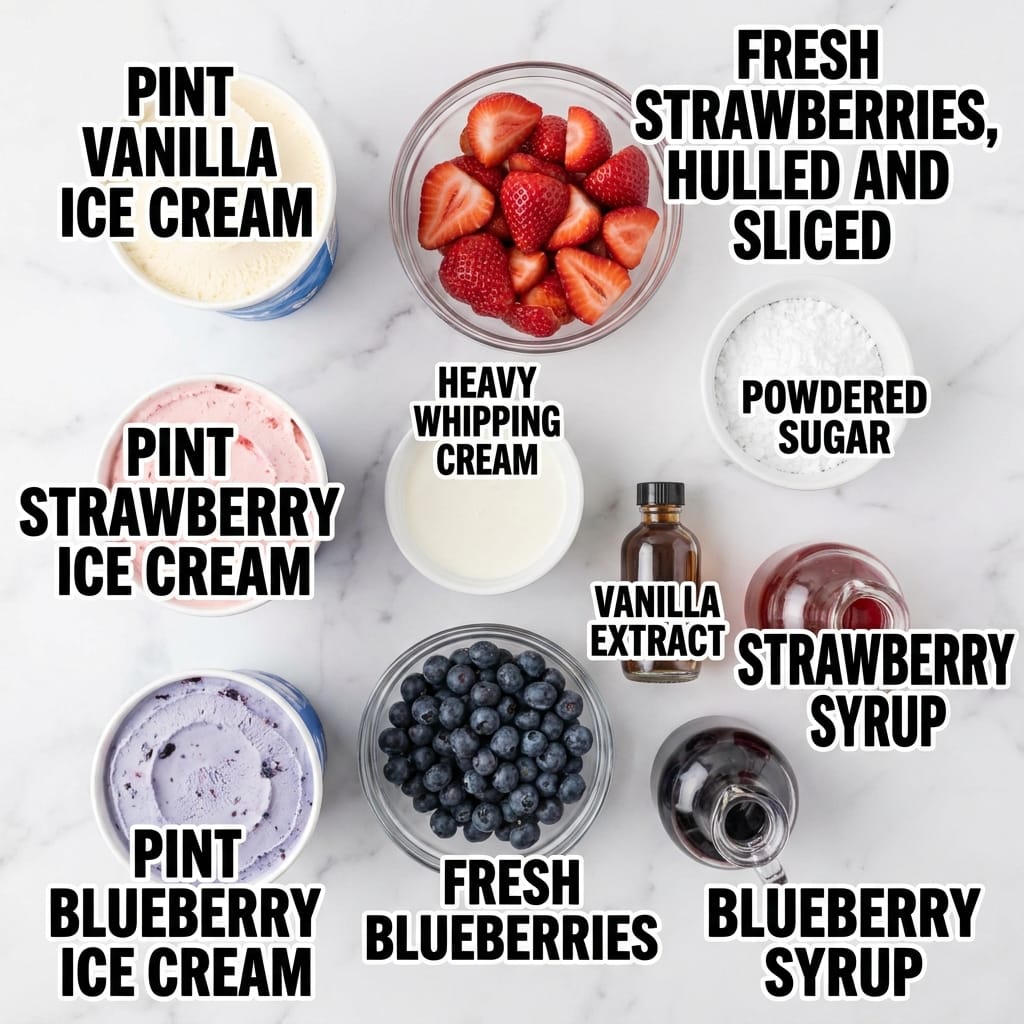
Ingredients
- 1 pint vanilla ice cream
- 1 pint strawberry ice cream
- 1 pint blueberry ice cream
- 1 cup fresh strawberries, hulled and sliced
- 1 cup fresh blueberries
- 1/2 cup heavy whipping cream
- 2 tablespoons powdered sugar
- 1/2 teaspoon vanilla extract
- 1/4 cup strawberry syrup
- 1/4 cup blueberry syrup
- 6 clear plastic or glass cups (8-ounce size)
- Whipped cream for topping (optional)
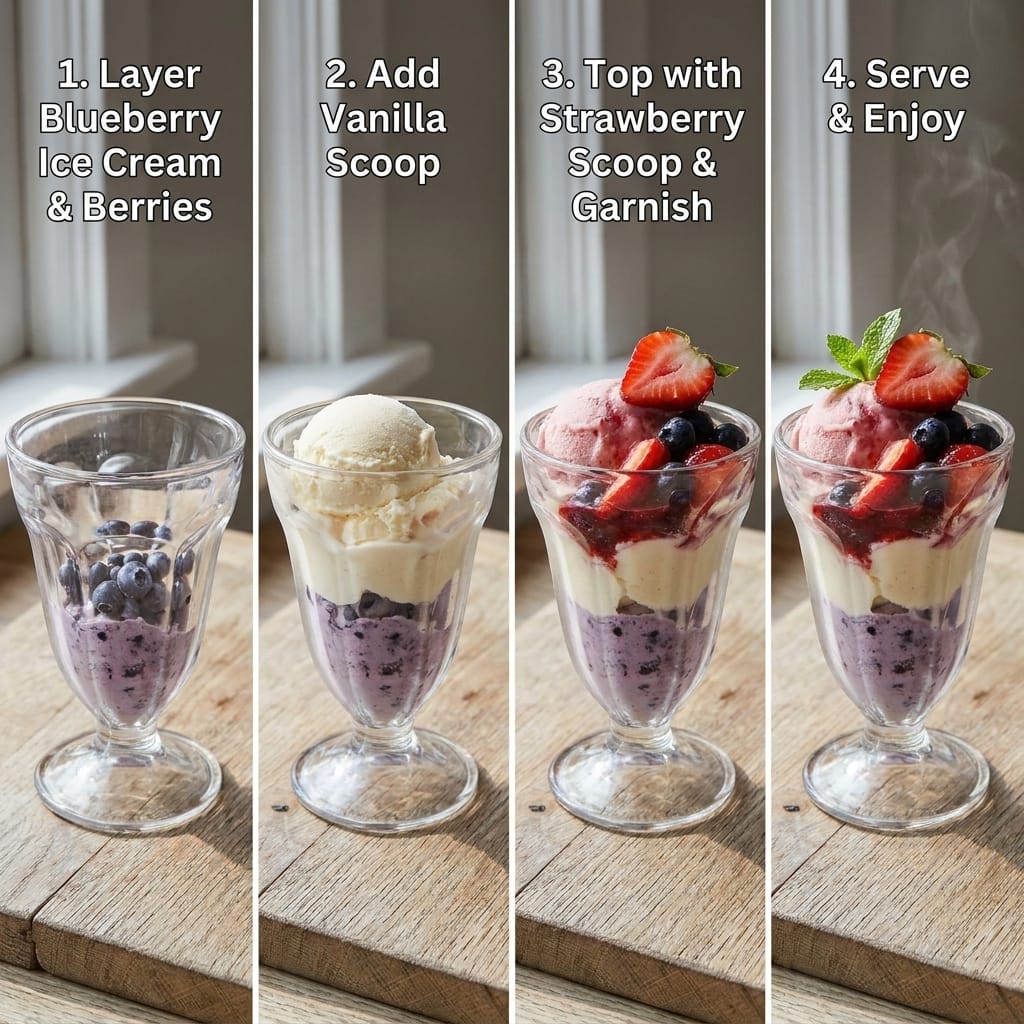
Step-by-Step Directions
- First, soften your ice creams just enough to scoop. Take all three pints out of the freezer and let them sit on the counter for exactly 5 minutes. Not 3, not 10. Five minutes is the sweet spot where the ice cream becomes pliable but not soupy.
- While the ice cream softens, make your homemade whipped cream. Pour the heavy cream into a chilled metal bowl. Use a hand mixer on medium speed. Watch the cream closely. When it starts to form soft peaks that flop over when you lift the beaters, add the powdered sugar and vanilla. Keep mixing for another 15 seconds until the peaks are stiff but still silky. Do not overmix or you will have butter.
- Now build the layers. Start with a tablespoon of blueberry syrup in the bottom of each cup. This creates a sweet base that soaks into the first ice cream layer.
- Add a generous scoop of blueberry ice cream to each cup. Press it down gently with the back of a spoon to create an even layer. The layer should be about an inch thick. Pop the cups into the freezer for 10 minutes to let this layer firm up completely.
- After 10 minutes, take the cups out. Add a layer of fresh blueberries on top of the blueberry ice cream. Press a few of them into the ice cream so they stay put.
- Next comes the white layer. Scoop the vanilla ice cream on top of the blueberries. Again, press it down gently to create an even, flat surface. This white layer represents the white stripes of the flag. Return the cups to the freezer for another 10 minutes.
- While the cups chill, prepare your strawberry layer. Slice the fresh strawberries into thin, even slices. You want them to be about a quarter-inch thick so they hold their shape.
- Take the cups out of the freezer. Add a layer of strawberry syrup over the vanilla ice cream. Then add a generous scoop of strawberry ice cream. Press it down gently.
- Top the strawberry ice cream with a layer of fresh sliced strawberries. Arrange them in a neat pattern if you are feeling fancy, or just scatter them casually for a rustic look.
- Finish with a dollop of your homemade whipped cream on top of each cup. If you want extra flair, add a small spoonful of blueberry syrup on top of the whipped cream and swirl it with a toothpick.
- Place the finished cups back in the freezer for at least 30 minutes before serving. This step is non-negotiable. The layers need time to set and meld together so the cups hold their shape when you serve them.
Pro Tips for Success
First, always use high-quality ice cream with real fruit chunks. Cheap ice cream has too much air and will melt into a watery mess. Look for brands that list cream and sugar as the first ingredients, not stabilizers and gums.
Second, do not skip the freezing steps between layers. I know it feels tedious, but this is the secret to getting those crisp, clean stripes. If you rush, the layers will bleed into each other and you will end up with a muddy purple mess instead of a proud flag.
Third, use clear cups so the layers are visible. Glass cups look elegant, but sturdy clear plastic cups work great for parties and are less likely to break. For more about the science of freezing and how ice cream texture works, check out this Wikipedia article on ice cream.
Servings and Timing
This recipe makes 6 individual Red & White & Blue Layered Ice Cream Sundae Cups. The total active prep time is about 25 minutes, but you need to factor in the freezing time between layers. Plan for about 1 hour from start to finish, including all the freezing steps. These cups are best served within 2 hours of assembly.
Variations and Substitutions
If you cannot find blueberry ice cream, you can use blueberry sorbet instead. It will be lighter and fruitier, but still look beautiful. For a white layer, you can use coconut ice cream or a dairy-free vanilla alternative. Strawberry ice cream can be swapped with raspberry or cherry for a different red flavor. If you want to make these Red & White & Blue Layered Ice Cream Sundae Cups a bit healthier, use low-sugar or no-sugar-added ice creams. The fresh fruit will still provide plenty of sweetness.
What to Serve With This
These sundae cups are a star on their own, but they pair beautifully with other festive desserts. Try serving them alongside my Grilled Pineapple with Cinnamon Honey for a warm and cold contrast. You can also set out a platter of No-Bake Cheesecake Bites for guests who want a different texture.
Storage and Reheating
Store any leftover cups in the freezer, tightly covered with plastic wrap or a lid. They will keep well for up to 3 days. Do not try to reheat these cups. They are meant to be served frozen. If the ice cream gets too hard, let the cups sit at room temperature for 5 minutes before serving. The whipped cream might deflate slightly after a day, so if you are storing them, add the whipped cream fresh right before serving.
FAQs
Can I use store-bought whipped cream instead of making my own?
Yes, you can. But homemade whipped cream is much fluffier and holds its shape better in the freezer. Store-bought whipped cream tends to deflate and get watery after a day. If you are in a hurry, though, it will work fine.
What if I cannot find blueberry ice cream anywhere?
You can make your own by softening vanilla ice cream and swirling in blueberry jam or puree. Just mix it gently so you get streaks of blue rather than a solid color. Or use blueberry sorbet as I mentioned above.
How far ahead can I assemble these cups?
You can assemble them up to 24 hours in advance. Just keep them tightly covered in the freezer. Add the fresh strawberry slices and whipped cream no more than 2 hours before serving for the best appearance.
My layers keep melting together. What am I doing wrong?
You are probably not freezing the cups long enough between layers. Each layer needs at least 10 minutes in the freezer. Also, make sure your ice cream is not too soft when you scoop it. If it is soupy, it will blend into the next layer.
Can I make these Red & White & Blue Layered Ice Cream Sundae Cups without dairy?
Absolutely. Use dairy-free vanilla, strawberry, and blueberry ice creams. Coconut-based or oat-based ice creams work best. The process is exactly the same.

Conclusion
Making these Red & White & Blue Layered Ice Cream Sundae Cups is easier than you think once you know the tricks. The key is patience with the freezing steps and using good quality ingredients. I love watching people’s faces light up when they see the perfect stripes in their cup. It feels like a little piece of edible art. I hope you try this recipe for your next celebration. Share a photo of your creation with me in the comments. I would love to see how your layers turn out.
 | ||||||||||||||||||||||||||||||||||||||||||||||||||||||||||||||||||